Configuring Bot Defense Profiles
General Settings Page
In the BIG-IP, browse to Security >> Bot Defense >> Bot Defense Profiles.
Select the Hackazon-bots profile. This brings you to the General Settings screen.

Select the Advanced View if it is not already selected.
Change the Enforcement Mode to Blocking.
The Profile Template is selected at profile creation and sets initial Mitigation and Verification Settings for the profile. Click the Learn more link to see more details about the template options and the initial settings for each.

Signature Staging is disabled by default. If enabled, Signature Staging will not block requests that match new or updated Bot Signatures for the duration of the Enforcement Readiness Period, which is 7 days by default.
The Final three options of the General Settings screen allow you to customize the Blocking Response and CAPTCHA Response pages.
Mitigation Settings Page
Select Mitigation Settings.
Note
For the purposes of the previous labs, the bot profile settings needed to be changed from their defaults so as to not interfere with the demonstration of other features such as Threat Campaigns and Credential Stuffing. The bot profile mechanisms are used by the WAF profile to handle JS injection for DeviceID and CAPTCHA and so were required for the previous exercises. However, the tools used to demonstrate the other features for this lab were automated and so would have been blocked by the Bot Profile.
- Change the Mitigation Settings for each of the categories to the defaults for the Balanced template as follows:
- Trusted Bot: Alarm
- Untrusted Bot: Alarm
- Suspicious Browser: CAPTCHA
- Malicious Bot: Block
- Unknown: Rate Limit

Click the Learn More link to review details about the settings on this page.
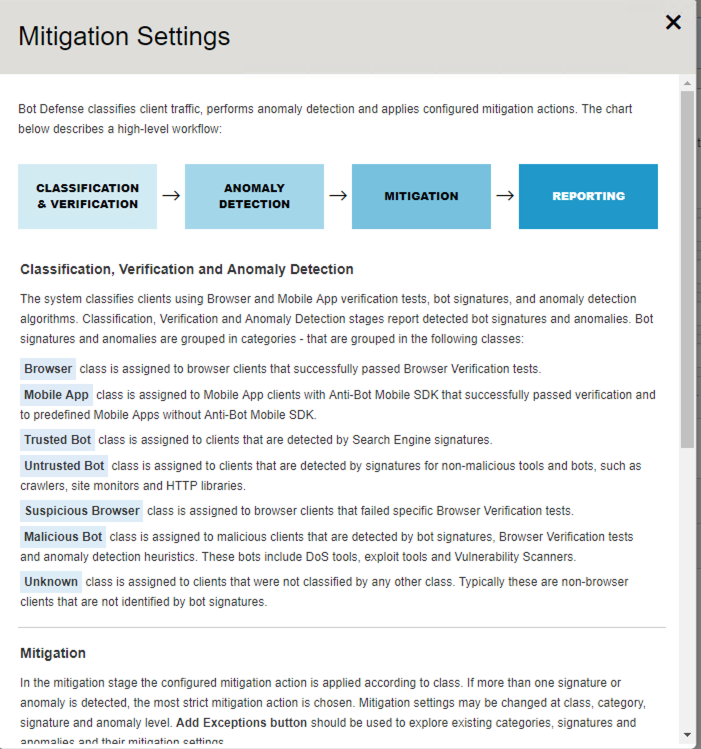
Take the time to read through this entire Mitigation Settings information screen.
We will use the Mitigation Exceptions feature later in this lab.
Microservice Protection
Select Microservice Protection

For Unified Bot Defense, a microservice is defined by a host name and/or a URI. Once the path to the microservice is defined unique Verification and Mitigation Settings can be applied to this path to protect against specific automated threats.
Click the Learn more link at the top of the page to get more details about the purpose of this feature in protecting against automated threats.
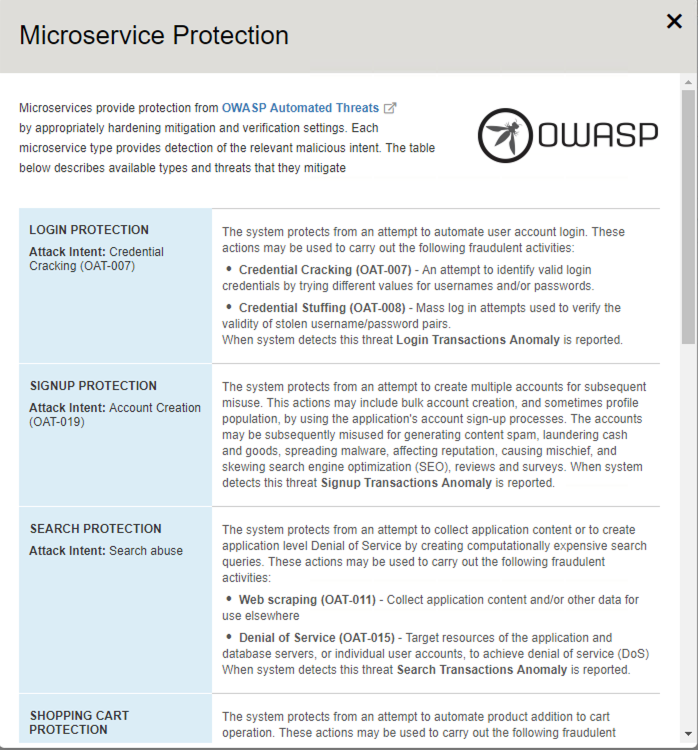
Let’s define a microservice to protect the Hackazon Login page. Click Create.

- Use the following settings to create the micro service:
- Microservice Name: login-page
- Service Type: Login Protection
- Protected URLs: /user/login
Leave all other settings at the default.
Notice the option to set the enforcement mode for this microservice to Transparent or Blocking or leave it at whatever is defined for the policy.
Scroll down to see the Mitigation and Verification Settings and Automated Threat Detection settings.

Notice that the Mitigation and Verification Settings are MUCH more strict for this type of threat.
Also, Notice that the default is to trigger a threat after three (3) access attempts by a unverified browser and to block that client for 5 minutes.
Click Add.
Browser Verification
Select Browser Verification.

- Ensure that the following settings are configured:
- Browser Verification: Verify After Access (Blocking)
- DeviceID Mode: Generate After Access
Browser Verification indicates the process of verifying clients that claim they are a browser. This is done by various passive checks of the headers and other attributes of the request, AND by client-side javascript challenges.
- Browser Verification setting options include:
- None: No verification of the browser will be performed.
- Challenge-Free Verification: Only passive checks of the request headers will be done. This includes verifying that the correct HTTP headers exist and are in the correct order based on the claimed browser.
- Verify Before Access: JavaScript challenges will be sent to the client browser BEFORE access is allowed to the backend application. This is the default (and only) option in Proactive Bot Defense prior to 14.1.
- Verify After Access (Blocking): Initial access is allowed to the backend application IF the Challenge-Free checks are passed. JavaScript challenges are injected into the server response and validated on subsequent requests.
- Verify After Access (Detection Only): Same as Verify After Access (Blocking) except verification failures will not be blocked. They are only used to detect and report on bots that are impersonating browsers.
DeviceID Mode has three (3) setting options. These are used to determine if and when the DeviceID javascript will be injected.
Verification and Device-ID Challenges in Transparent Mode allows the admin to disable the injection of these Javascripts if the policy is in Transparent mode. This may be necessary because even though the policy is in blocking mode, the injection of javascript may block valid non-browser clients.
Single Page Application and Cross Domain Requests settings are outside the scope of this lab. You can use the Help menu to learn more about when and why these settings would be used.
Click Save to save the changes we have made thus far.
This will take you back to the Bot Defense Profiles screen. Click the Hackazon-bots profile to review the rest of the settings screens.
Mobile Applications
Click Mobile Applications.

This screen allows control and integration with the F5 Anti-bot Mobile SDK.
Most Mobile applications are not capable of processing javascript. Because security controls cannot validate the mobile application with javascript it would be easy for an attackers to impersonate the mobile application’s user-agent header and gain unverified automated access to the backend applications. The F5 Anti-bot Mobile SDK allows for easy integration of F5’s mobile app protections and verifications through a partner service, Appdome. The F5 Anti-bot Mobile SDK facilitates the validation of the mobile application, integration with the Unified Bot Defense protections while also blocking fraudulent requests that are impersonating the mobile application.
Mobile Applications settings are outside the scope of this lab.
Signature Enforcement
Click Signature Enforcement.

Signature Enforcement allows for the staging or enforcement of bot signatures IF staging is enabled for the policy.
Whitelist
Click Whitelist.

Whitelist allows for bypassing Bot Defense mechanisms based on IP address and/or URL.
Notice that some URLs are already listed by default. These are included because some browsers behave differently when accessing these URLs and do not some some or all cookies, which can cause false positives for Bot Defense verifications.