Configuring Brute Force Protection
Before we can protect a login page from brute force attacks, we must define the login page and its properties. This defines the URL for the login page, what parameters are used for username and password, and how to differentiate a successful login from a failed login attempt.
In this lab we will use the information gathered in the previous exercise to configure a login page in the WAF policy.
Define Login Page
Browse to Security >> Application Security >> Sessions and Logins >> Login Pages List. Click Create.
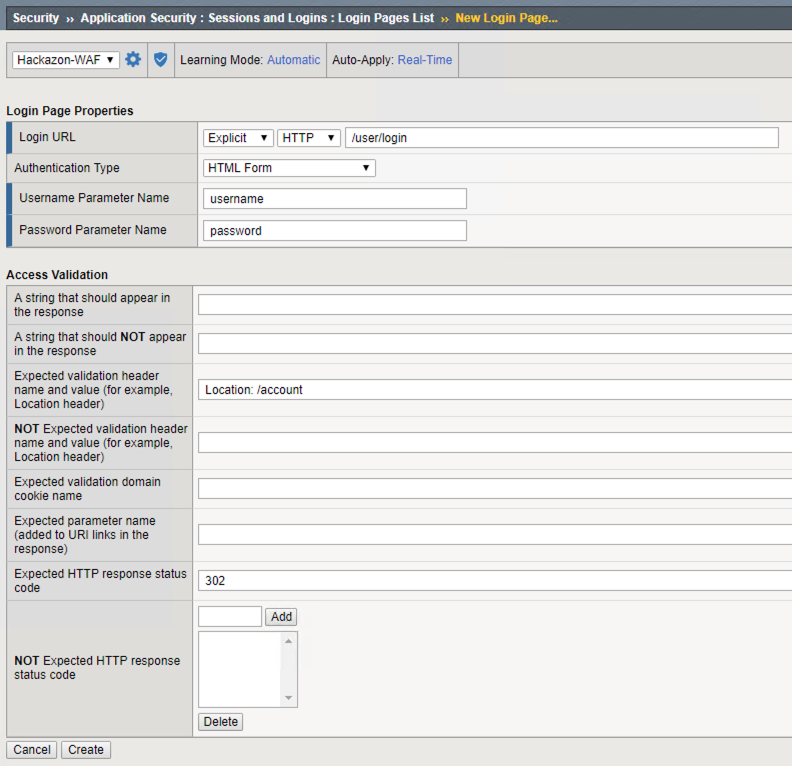
In the Login Page Properties screen, complete the configuration using the information you collected in the previous exercise. When finished click Create.
Tip
Review the properties on this page. There are multiple ways to configure ASM to tell the difference between a successful login and a failed login attempt. Instead of using the Expected validation header and response status code we could have used the Not Expected values.
Enable Brute Force Protection
Now that the login page is defined in the policy, we can configure Brute Force (and Credential Stuffing) protections for it.
Browse to Security >> Application Security >> Brute Force Attack Prevention. Click Create.
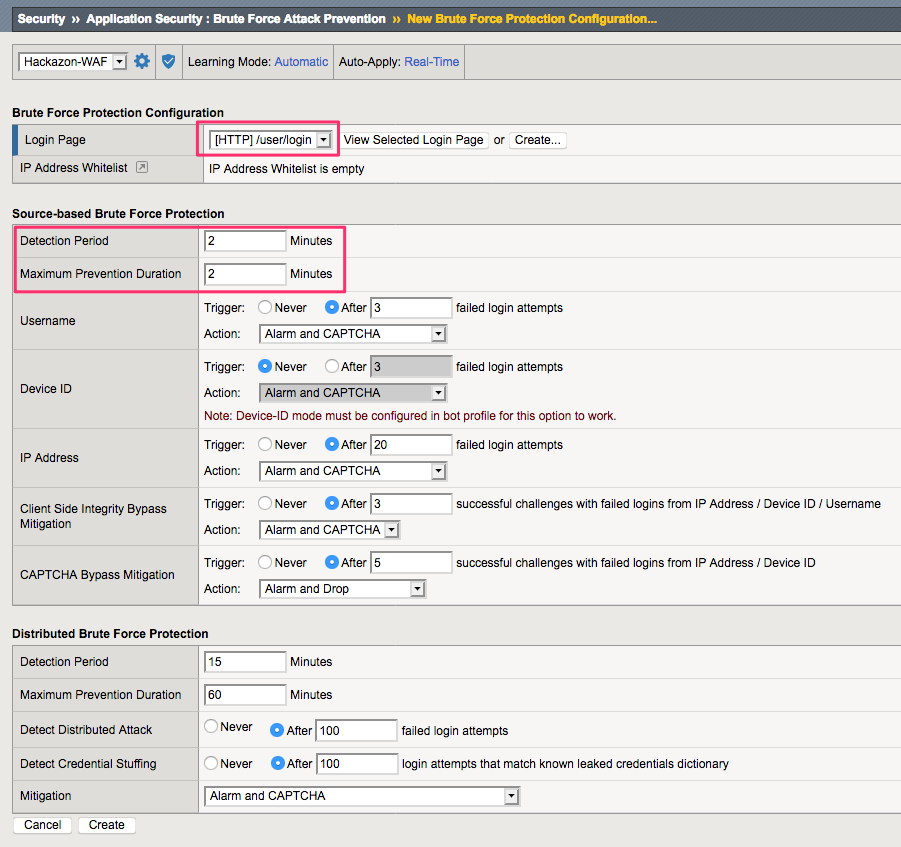
In the Brute Force Protection Configuration screen, select the Login Page you created in the previous exercise.
For the purposes of this lab we will change the Detection Period and Maximum Prevention Duration to 2 minutes. Also, Leave all other settings at their defaults.
Note
This will help us more quickly separate the different detection methods as we move through the lab.
When finished click Create.
Warning
Click Apply Policy to make these changes effective in the policy.